
Your stores are saved in the block itself, so you add and change them right in the block editor.
Add a store
- Select the Store Locator block. The Stores panel in the sidebar lists your stores.
- Press Add store.
- Fill in the fields you need: Name, Address, Town or city, Postcode, Country, Phone, Email, Website and Opening hours.
- Under Place on the map, press Find on map.
- Press All stores to go back to the list.

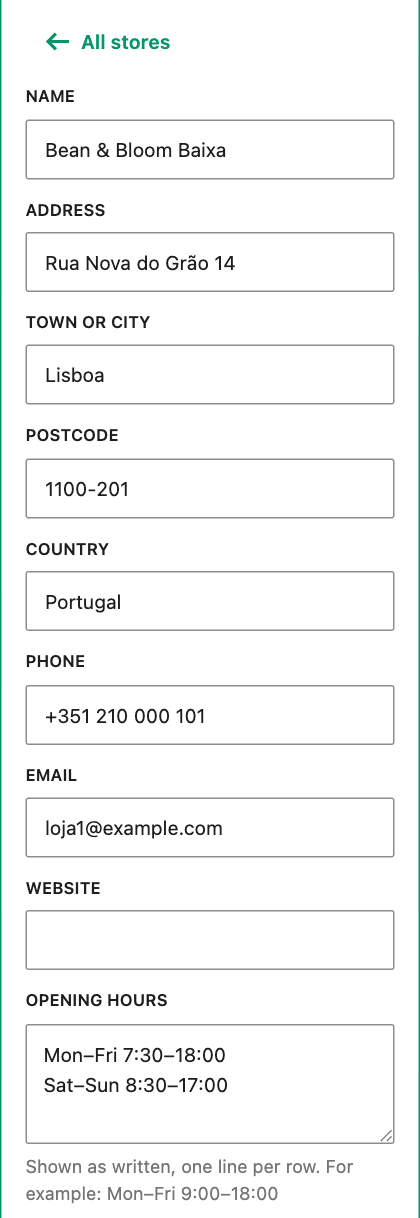
Opening hours is shown as you write it, one line per row, for example Mon–Fri 9:00–18:00 on one line and Sat 10:00–16:00 on the next.
Put a store in the right place
- Find on map looks up the address on OpenStreetMap. If the street is not found, it tries again without the postcode, then the town alone, and tells you so: the pin is then in the middle of the town, so drag it into place.
- Drag the orange pin on the map to move the store being edited.
- A store with no place yet: click the map where the store is.
- Or type the coordinates in Latitude and Longitude (for example 51.4545 and -2.5879).
Only the store you are editing has an orange pin you can drag. Click any other marker on the map in the editor to open that store.
Add a picture
Under Image, press Choose image and pick a photo from the Media Library. It shows as a small square next to the store in the list. Remove image takes it away.
Order and delete
- The page lists the stores in the order of the Stores panel. Use the Move up and Move down arrows to change it. When a visitor searches, the stores are sorted by distance instead.
- With more than 8 stores, a Search the stores field helps you find one in the panel.
- To remove a store, open it and press Delete store.
What visitors see
Each store shows its name, address, opening hours, and its phone, email and website as links. A press on a phone number starts a call on phones. A click on a store in the list opens it on the map, and a click on a marker shows the store in the list.
Good to know
- A store needs at least a name, an address or a town to show. It is on the map only when it has both a latitude and a longitude.
- In the Stores panel, a store without a place is marked Not on the map.
- An email or website that is not a valid address is not shown on the page; the form says Not shown on the page: this is not a valid address.
- One block holds up to 500 stores. For more, add a second Store Locator block, for example one per country.